To enter the stocktake details in Micronet:
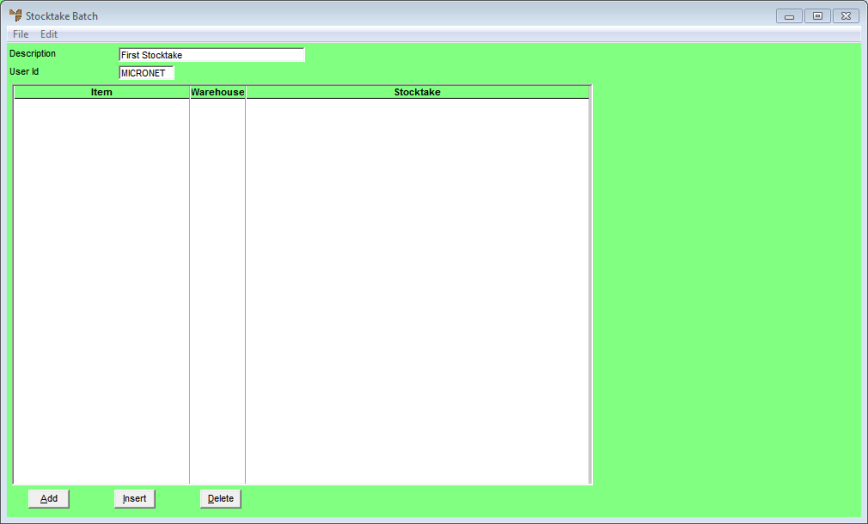
Micronet displays the Stocktake Batch screen.
Nothing further requires changing.
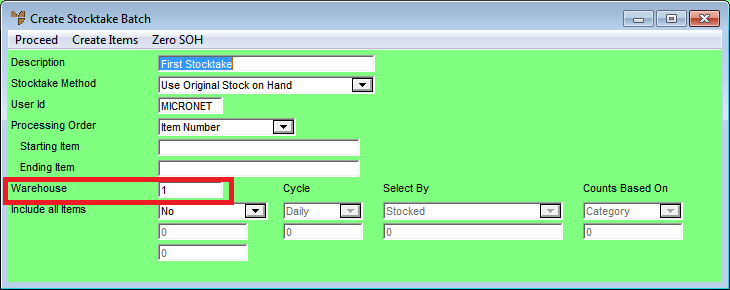
Micronet redisplays the Stocktake Batch screen.

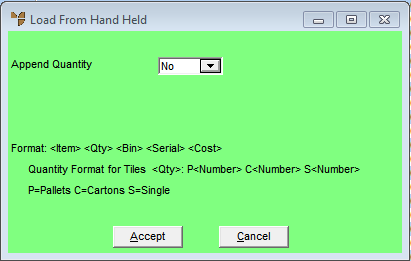
Micronet displays the Load From Hand Held screen.
Micronet displays the Enter Auto Stock Line screen.

The scanner connects to the workstation.
![]()
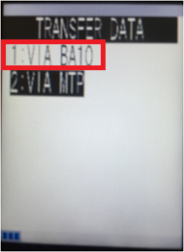
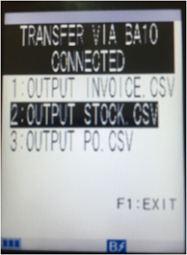
The stocktake data is transferred to Micronet.
Micronet imports all the scanned stock lines into your stocktake batch.

|
|
|
Technical Tip If required, the quantities can be changed after loading. Items can also be added or deleted if required. |
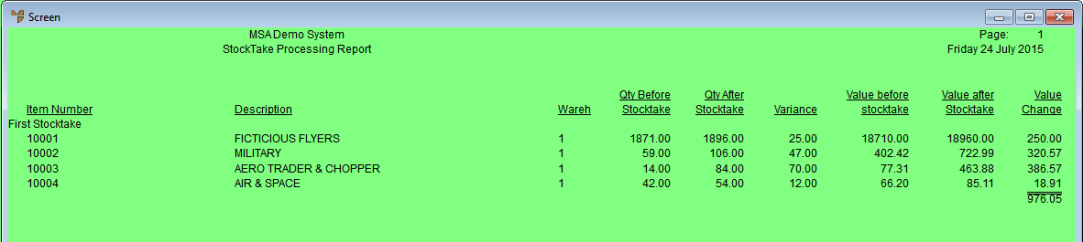
Stocktake Processing Report
|
|

|
Best Practice When you have finished the Stock file import, you should delete the stocktake file on the Micronet batch scanner by selecting Stocktake from the main menu and then selecting Clear Stocktake and Yes.
|
Be aware that the next time you load a Stock file from the scanner into Micronet, you will need to overwrite the existing Stock file.
